


I discovered the Carroll Shelby Beef Chili kits as a child and have always loved them. When I realized they also make a Chicken Chili kit, I knew I had to buy them and try them out at home. As expected, they did not disappoint.
I love this recipe because you can really customize the chicken chili with any beans and veggies. Plus, it’s a one-pot meal, which makes clean-up a breeze.
Where to Buy Carroll Shelby Chili Spice Kits
For this recipe, I depend on Carroll Shelby’s White Chicken Chili Spice Kit. You can buy it directly from the Carroll Shelby website or from one of their retail partners. On their site, you can actually put in your zip code and it will show you all of the nearby stores that carry their products. It depends on your store, but they typically cost around $2 a box.
A Few Notes About the Other Ingredients:
- Type of Chicken: I typically use chicken breasts or chicken tenders for this recipe. You’ll want to make sure they are skinless and boneless. I tend to cut the chicken into half-inch cubes since I like the chili with smaller pieces of chicken.
- Favorite Beans: My go-to is either Great Northern or cannellini beans. Really, any type of white bean will work for this.
- Canned Veggies: Because the spice kit has a fair amount of sodium, I prefer to use no-salt added beans. I have had the easiest time finding no-salt added beans from Whole Foods (their 365 brand is less than a $1/can).
How To Make One-Pot Chicken Chili with White Corn
Gather and Prep Your Ingredients

Often times, I’ll actually double this recipe because I love it so much.
Brown Chicken

For this recipe, I purchased 2lbs of boneless skinless chicken breasts and then cut them up into half-inch cubes. I love using our Dutch oven to brown the chicken, but you can also use any stock pot.
Sauté Onion and Bell Pepper

You can use green, orange, or red bell peppers for this recipe. Jake’s favorite is red bell pepper, which is why I used it for this recipe.
Add Remaining Ingredients

Simmer for 30 Minutes
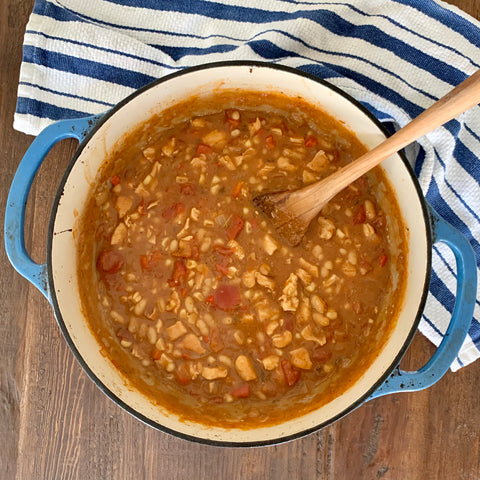
According to the ingredients on the box, you should simmer the chili for 15 minutes with a lid and 15 minutes without a lid to help the chicken chili thicken. I have found that it’s easiest for me to bring the chicken chili to a light boil, then reduce to a simmer over low heat and cover with a lid. I cook the chili for at least 30 minutes and stir it every 15 minutes or so.
Favorite Ways to Eat Chicken Chili

Typically, we eat chicken chili in one of three ways:
- Served over French fries or a baked potato with shredded cheese on top
- In a bowl topped with tortilla chips, avocado, and shredded cheddar cheese
- In a bowl with cornbread as a side
Freezing and Reheating Leftover Chicken Chili

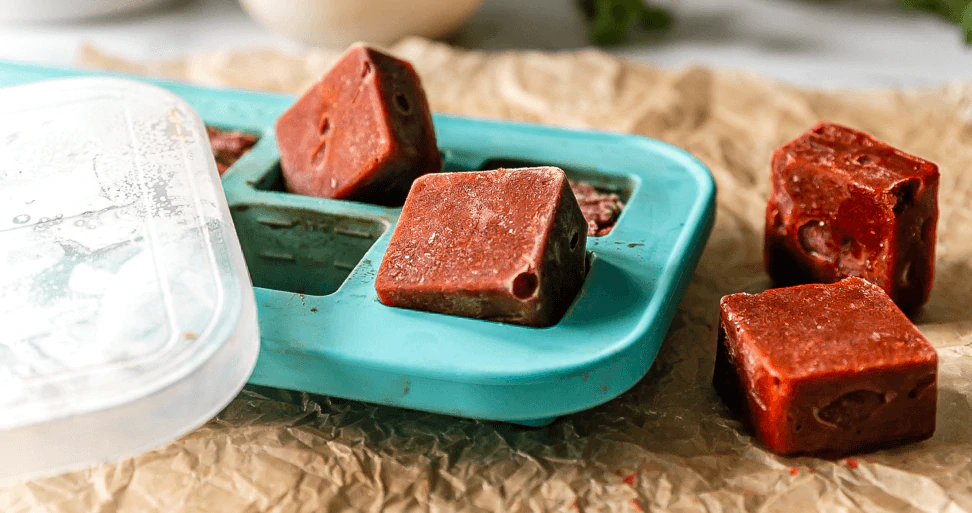
Chili freezes and reheats so well. It’s a go-to dish in our freezer stash. Our favorite is to ladle any leftover chili into our 1-cup Souper Cubes® tray. Once full, we place on the snug-fitting lid and freeze. We will often leave the chili in the Souper Cubes tray until we need to use the tray to freeze another dish. From there, we will place 8 cups worth in a gallon-size bag.
We recommend using a freezer-safe bag (as opposed to a regular plastic bag) as they are often slightly thicker and do a better job of storing your frozen food in our experience. If you’re looking for a reusable bag option, we recommend ReZip’s Gallon-Size reusable bag, which you can buy from the ReZip website or Amazon. I’ve also seen them at Target.
To Reheat Chili:
- Microwave: Place frozen cubes in a microwave-safe and microwave until hot. In our microwave, it takes about 3-4 minutes to heat a cup of soup or chili.
- Stovetop: Place frozen cubes in a pot and cover with lid. Heat over a medium-low heat until the bottom of the pot is covered


We would love to hear your ideas or better yet, post a photo of your cubes organized in our Freezer Meals & Recipes Facebook Group!