


Introduction
Your new go-to meal: The Ultimate Burrito Bowl that’s also freezer friendly! The directions and recipe here are for a fast, fresh and flavorful dinner the whole family will enjoy! The chicken burrito bowls are packed with flavor and assembled with a flavorful lime-spiced chicken, aromatic cilantro-lime rice, creamy black beans, and sweet peppers and onions. Top this burrito bowl recipe with a light avocado crema that you will want in your weekly meal rotation. Freeze leftovers in your Souper Cubes trays for a delicious weeknight meal ready in under 10 minutes for a fraction of the price of take-out.
Why You'll Love This Burrito Bowl
This easy and satisfying burrito bowl is perfect for prepping ahead to feed your hungry family during those busy weeks and will be a total win for your whole family. They are loaded with flavor and packed with all your favorite burrito classics. Best yet, it is customizable, flavorful and easy to prepare.
Who doesn’t love that you get to personalize your own bowl? Recipes like this chicken burrito bowl are lifesavers and the kind of recipe that you can throw together quickly and create a fun night with your family by creating a customized topping bar to go along with the bases for the bowls. We really love ours topped with mango, crunchy tortilla chips, and pickled red onions.
Try doubling or tripling the recipe to make a big batch and freeze it for later, you will thank yourself later with a little work up front for the upcoming weeks.
Ingredients You’ll Need

Protein Options:
This burrito bowl features a thin chicken breast that is coated in a flavorful spiced paste that cooks quickly over high heat and has a hint of fresh lime juice. You can also mix up the protein and use chicken thighs, ground beef, steak tips, or plant-based options like tofu or cauliflower.
Chicken: grilled, shredded, ground or baked
Beef: ground, barbacoa or carnitas
Vegetarian: tofu or cauliflower
Grains or Base:
Cilantro-lime rice is fresh and bright with garlic, chopped cilantro, lime zest and juice, and scallions creating a flavorful base to create your own custom bowl. Or it can be used for a side dish to a great meal like tacos, enchiladas, taquitos or in a burrito itself.
You can also keep it simple and season your white, brown, quinoa or cauliflower rice with salt, pepper and a squeeze of lime juice for the base of this dish using your rice cooker or on the stove top.
Toppings & Mix-ins
This is the fun part! Go crazy and top with additional toppings as desired like:
- freshly chopped cilantro
- fresh lime wedges
- shredded cheddar cheese
- crumbled cotija cheese
- finely shredded lettuce
- thinly sliced green onion
- pickled red onions
- chopped ripe tomatoes
- roasted frozen or freshcorn
- crushed tortilla strips
- pico de gallo
- hotsauce
- ripe chopped mango
Sauces & Extras
Honestly, the creamy freezer-friendly avocado crema is all you need to finish this satisfying chicken burrito bowl. But, if you choose to skip this step to save a little bit of time, try topping with a chipotle mayo and some fresh avocado. If you find yourself wanting to elevate the heat and bring the bowl over the top, try adding a pickled jalapeno or zesty & spicy fresh serrano pepper!
How to Make a Chicken or Beef Burrito Bowl (Step-by-Step)
Protein Prep

Cook your protein: Toss your chicken with spices, lime juice and garlic and let it marinade for up to overnight for the most intense flavor. But if you have limited time, 30 minutes will do. Grill or pan-fry until golden, juicy and cooked through, about 10 minutes total. Once it has rested for a few minutes to lock in all those juices, slice or cube to prepare to freeze in our Souper Cube trays.
Alternative preparation: If you prefer to grill the chicken, preheat the grill to medium heat and place on the grill and cook undisturbed about 6 minutes per side until the chicken is cooked through by inserting a thermometer reading 165F. Remove from the grill and place tin foil over top and let rest for 5 minutes before slicing so all of the juices remain intact.
Cook your Vegetables

Simply heat your oil until shimmering and cook onions and colorful bell peppers until tender and caramelized, then add a hint of oregano and salt to finish.
Cook your Rice
This recipe is super easy to make, first cook the rice either on the stovetop, instant pot, or rice cooker. This takes about 20 minutes and is best with long grain rice like jasmine or basmati. Once the rice is cooked add garlic, scallion, lime zest & juice, and salt to the pot while warm. Fluff with a fork, then add your cilantro and a bit of heat with a serrano or jalapeno finely diced.
Cook your Beans
We made it easy using canned beans, but if you prefer soaking and cooking your beans, you can certainly do this, just be prepared after soaking, to add 2-3 more cups of water or broth and cook for longer for the beans to soften. Sprinkling cilantro in at the end of cooking before you mash the beans gives this an amazing brightness.
Make your Sauce
Simply throw all the ingredients into a blender and you have this cool, creamy sauce to add to your chicken burrito bowl. If the sauce is too thick, simply add a bit of water or milk to thin it down.
Take the avocado, greek yogurt, lime juice, onion & garlic powder, and salt and blend it up in the blender or food processor until smooth. Alternatively, you can mash it by hand for a more rustic look.
Assemble Your Bowl
Layer your chicken burrito bowl by starting with the lime-cilantro rice base, then top with beans on one side, peppers & onions on the other. Then top with your juicy chicken. To top it all off, add your avocado crema sauce and customize your bowl with additional toppings, as desired. A simple great way to finish the bowl is just squeezing it with a lime wedge.
Add Your Favorite Toppings
Choose any toppings from your imagination and think about all the textures and temperatures of each component to enhance the eating experience. Adding a bit of acid like lime juice or a sprinkle of your favorite herbs will brighten the dish up.
Finish with Sauce & Garnish

Top the finished bowl with the avocado crema, a few sprigs of cilantro and a wedge of lime.
Pro Tips for the Best Burrito Bowl
Chicken Tips
Pounding the chicken to an even thickness using a rolling pin or meat mallet helps tenderize the chicken and allows for even cooking.
Allowing the chicken to sit for 30 minutes at room temperature or overnight in the refrigerator imparts the best flavor by allowing the marinade to penetrate the protein and give a savory crust.
If you chill the chicken, let it sit out for 30 minutes for the protein to come to temperature to even cook and the chicken breast to remain moist.
Rice Tips
For the fluffiest rice, rinse the rice before cooking to remove excess starch by running under cold water, until the water runs clear.
When the rice is still warm, add the remaining ingredients (except the cilantro). This will help disperse the flavor throughout the rice. If you add the cilantro too early it will wilt.
Variations
Increased fiber & protein: This recipe would work well with any grain like farro, brown rice, or quinoa. Just cook those according to the instructions.
Low-carb option: Trying to get more veggies in? Replace the rice with half cauliflower or broccoli rice, bed of lettuce or sauteed greens. Either saute ahead of time and add in or add before you turn rice off.
Dairy-free: Swap the Greek yogurt with a non-dairy alternative.
Storage

Store components separately in airtight containers in the fridge for up to 4 days.
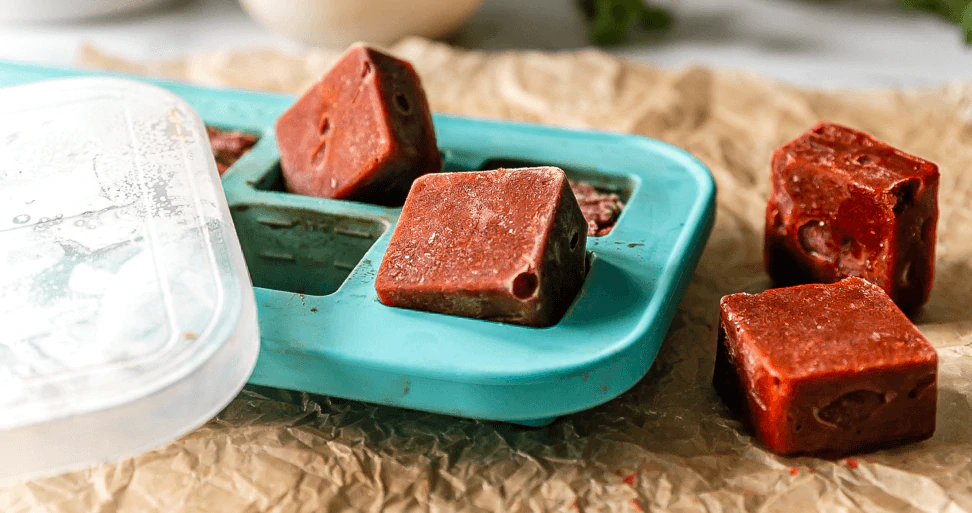
First, place the cooked food into each compartment of the Souper Cubes tray up to the desired fill line. Place the lid on top once the food has fully cooled. Label the lid with our labeling tape or water-based paint makers.
Set the tray flat in your freezer and stack remaining trays on top, freeze overnight for up to 3-4 months. Once the food is solid, you can pop out the cubes and store them in labeled freezer-safe bags so you can wash and reuse your Souper Cube trays for another meal.
Chicken vs. Beef Burrito Bowl: Which One Should You Make?
Honestly, you can’t go wrong! Choose what works best for you. Chicken is leaner and lighter and goes well with the citrus notes, fresh herbs and creamy avocado. Beef brings a bold, savory flavor and the higher fat content pairs well with the spicy sauce and acidic lime. Go with whatever you are craving and work best for your family.
FAQ
How to Freeze Burrito Bowls in Souper Cubes:

There is not one way to freeze these Chicken Burrito Bowls. It really depends on your space in the freezer and how many trays you own. You can fill one tray with all chicken and rice, and another with beans and vegetables. Do what works for you, the size of the tray you use is up to you!
But whatever you decide to do, before transferring the trays to the freezer, make sure the ingredients are cool. You can either freeze layered burrito bowls in our 2-cup freezer trays for easy reheating or freeze individual components in our half-cup or 1-cup trays so that you can assemble the bowls once they’re reheated. We love freezing the avocado crema in our 2 tbsp trays.
This recipe will fill two Souper Cubes 1-cup or 2-cup trays.
You can leave your meal in the Souper Cube trays, but then that ties up your trays for freezing other meals until you use your Ultimate Chicken Burrito Bowls. We suggest transferring the burrito bowl components to a freezer-safe Ziploc bag, reusable bag, or vacuum seal bag for longer storage.
How long does a burrito bowl last in the freezer?

We say 3-4 months for optimal freshness, as long as it has been consistently frozen, it’s safe to eat indefinitely. For longer term storage transfer frozen cubes to a vacuum sealed bag for best results and to prevent freezer burn.
How to reheat a frozen burrito bowl?
When it’s time to make your burrito bowls, you will want to pull the kit from the freezer and transfer it to the fridge to thaw. This lets you cut down on the reheating process. However, if you forget to thaw in advance, that’s okay too! The easiest way to reheat from frozen is using your microwave. We love using our 5” rectangular baking dishes if freezing the individual components of the burrito bowl separately. If you’re freezing a layered 2-cup burrito bowl, then we recommend transferring to our 5” square baking dish and reheating in the microwave with the silicone lid on ajar.
Microwave: Transfer each component (grain, protein, beans, veggies) to its own microwave-safe dish or our baking dishes and cover, and let defrost in the refrigerator overnight.
Alternatively, you can go directly from the freezer to heating. Simply pop out the cubes and separately place in a microwave container or baking dish, add a splash of broth or water, to prevent drying out, cover and microwave on 50 % power, stirring halfway through, for about 4 minutes, or warmed. We would not suggest microwaving the crema as it may discolor or separate.
Oven: Transfer each component to its own oven safe dish or our 5” rectangular baking dish and cover, and let defrost in the refrigerator overnight. Then place in a preheated oven at 350F, covered for about 20 minutes or until it registers 165F when a thermometer is inserted into the center of each dish.

Alternatively, you can go directly from the freezer to heating. Simply pop out the cubes and separately place in a heat proof container or baking dish, add a splash of broth or water, to prevent drying out, cover and reheat on 350F, stirring halfway through, for about 20 minutes, or warmed. Although, we would not suggest heating the crema as it may discolor or separate.
Stovetop: Transfer each component to its own dish or our 5” rectangular baking dishes and cover, and let defrost in the refrigerator overnight. Then heat in a skillet until warm.


We would love to hear your ideas or better yet, post a photo of your cubes organized in our Freezer Meals & Recipes Facebook Group!